

How to Display Original Landscape Paintings
Aug 29, 2026
Table of Contents
- How to Display Original Landscape Paintings: The Essentials
- Best Lighting for Original Oil Paintings
- How to Hang Art at Eye Level
- Protecting Original Paintings from Sunlight
- Gallery Wall Layout Ideas for Landscape Art
- Visualizing Art Before Installation
- Hardware, Mounting, and Installation
- Conclusion
Last Updated: August 29, 2026
How to Display Original Landscape Paintings: The Essentials
Displaying original landscape paintings properly transforms them into focal points that enhance your space. The difference between stunning work and pieces that fade into the wall comes down to three things: lighting, placement, and protection.
At Cairngorm Artists, we've helped collectors worldwide display their original paintings with confidence. Our safe-arrival promise ensures your piece arrives ready to hang, but what happens next matters equally. The way you position, light, and protect your artwork determines whether it remains vibrant for decades or fades within years.
This guide covers the practical mechanics of displaying original landscape paintings in your home. You'll learn how to hang art at the right height, choose lighting that complements without damaging, arrange multiple pieces into cohesive gallery walls, and protect your investment from degradation.
Best Lighting for Original Oil Paintings
The right lighting reveals the painting's true colors and texture while protecting the work from degradation. Most people focus on the first and ignore the second.
Accent Lighting vs Ambient Light
Accent lighting is directional light aimed specifically at your painting. Ambient light is the general room illumination. You need both.
Accent lighting reveals detail and draws the eye to your landscape. A picture light mounted above the frame or track lighting positioned to graze the canvas shows brushwork, texture, and color depth that ambient light alone cannot. The light should hit the painting at roughly a 30-degree angle to minimize glare while maximizing visible detail.
Ambient light prevents your painting from becoming a dark spot in an otherwise lit room. Balanced ambient lighting keeps the painting integrated into the room's overall aesthetic.
Use ambient light as your baseline (ceiling fixtures, wall sconces, or natural daylight), then add accent lighting to enhance specific paintings. For landscape work, accent lighting reveals the atmospheric depth that makes Highland scenery compelling.
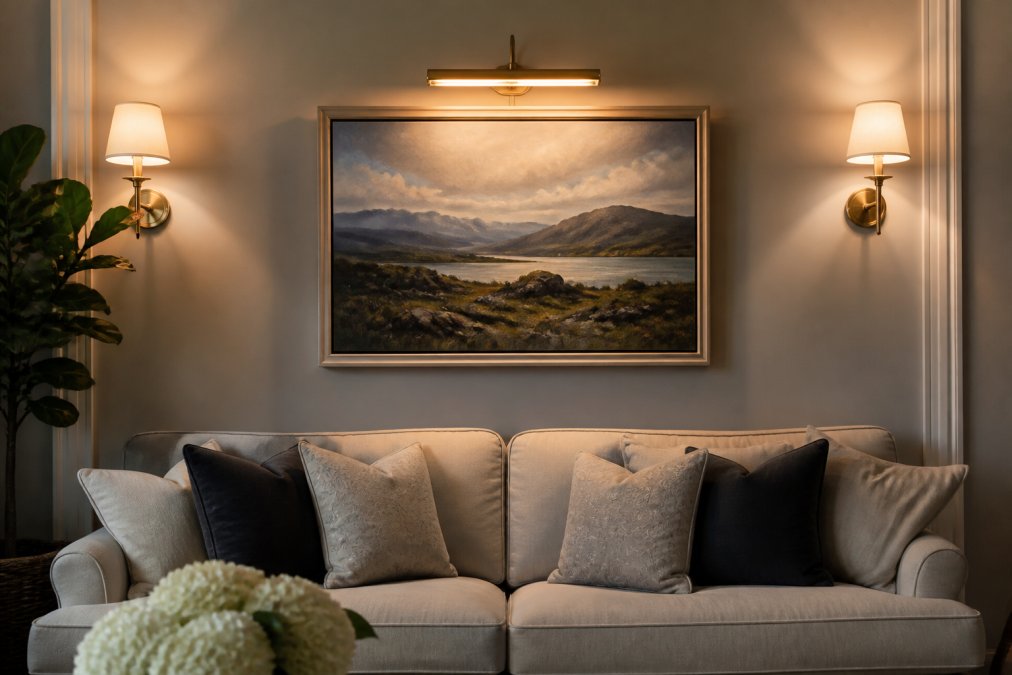
A living room with a single original landscape painting hung above a sofa, illuminated by warm accent lighting from a picture light mounted above the frame, with soft ambient light from wall sconces creating balanced overall room lighting
Avoiding Glare and Heat Damage
Glare happens when light reflects directly off the painting's surface rather than being absorbed. It obscures color and detail, signaling that your lighting angle is wrong.
Heat is the less visible problem. Halogen and incandescent bulbs generate significant heat. If a picture light sits too close to your painting, heat can affect the canvas, accelerate pigment fading, and potentially warp the frame over time. LED accent lights solve both problems: they produce minimal heat and their directional nature reduces glare when positioned correctly.
Position accent lights at least 12 inches from the painting's surface (the American Academy of Dermatology). Angle them so light hits the canvas at 30 degrees rather than straight-on. Test your setup by stepping back and viewing from different angles; glare should be minimal from all positions.
How to Hang Art at Eye Level
Eye level is the foundation of art placement. Get this wrong and even exceptional work feels awkwardly positioned.
The Standard Eye-Level Rule
Eye level for art is approximately 57 to 60 inches from the floor to the center of the painting. This is the standard used in museums and galleries because it's where the human eye naturally rests when standing in a room.
If the center of your painting sits at or slightly below eye level, viewers engage with it naturally without tilting their heads. Paintings hung too high feel distant. Paintings hung too low feel confrontational.
Measure from the floor to the center point of your frame. If you're hanging a 24-inch-tall painting, the center is 12 inches from the top. If your frame's top edge should sit at 72 inches from the floor, the center lands at 60 inches, perfect eye level.
This rule applies whether you're hanging a single landscape or building a gallery wall.
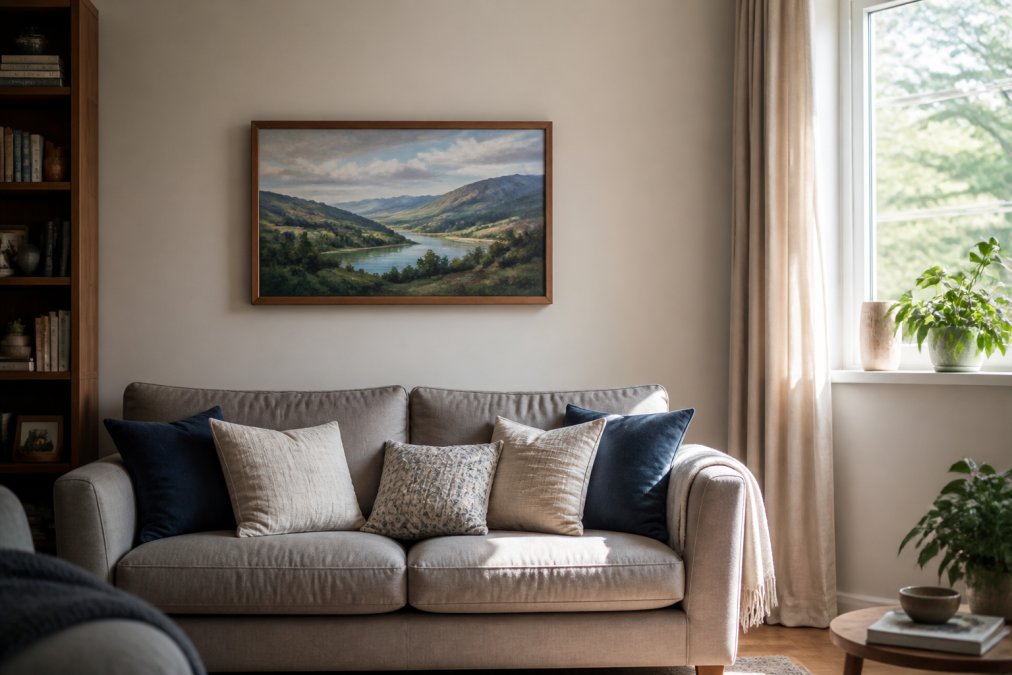
A living room wall showing a single original landscape painting in a wooden frame hung at proper eye level above a sofa, with the painting's center positioned at approximately 57 inches from the floor, natural light from a window illuminating the piece
Spacing and Proportions for Single Pieces
A single painting needs breathing room. The wall space around it matters as much as the painting itself.
For a landscape hung above furniture (like a sofa or console table), position it 8 to 12 inches above the top of the furniture. This creates visual connection without feeling cramped.
Wall space on either side should be balanced. If you're centering a landscape on a wall, measure from the left and right edges to ensure equal spacing.
As a rough guide, your artwork should occupy between 50 and 75 percent of the wall space above the furniture you're hanging it above. Smaller than that and it disappears. Larger and it overwhelms.
Protecting Original Paintings from Sunlight
Sunlight is the primary threat to original paintings. It fades pigments, yellows varnish, and accelerates deterioration of canvas and frame materials.
UV Protection and Archival Quality
UV (ultraviolet) light is invisible but relentless. It breaks down the chemical bonds in pigments, causing colors to fade and shift over time. Oil paintings are particularly vulnerable because pigments sit on a canvas surface with minimal protective barrier.
Archival quality refers to materials and methods designed to resist degradation. Archival-quality framing uses UV-filtering glass or acrylic, acid-free matting, and conservation-grade mounting techniques. These materials don't stop UV damage entirely, but they reduce it significantly.
If your paintings are already framed without archival protection, consider reframing them. For original work, it's an investment that pays dividends in preservation.
Positioning Away from Direct Rays
Direct sunlight through windows is the worst-case scenario. It creates concentrated UV exposure and heat that accelerates fading dramatically. A painting that gets four hours of direct sun daily will fade noticeably within 5-10 years (peer-reviewed research).
Indirect natural light is acceptable. A painting positioned on a wall that receives ambient daylight from a window (without direct sun hitting it) ages much more slowly.
The most conservative approach: hang original paintings on walls that don't receive direct sunlight. If your room's layout forces you to choose between direct sun and a less-ideal wall position, choose the less-ideal position every time.
Gallery Wall Layout Ideas for Landscape Art
Gallery walls let you display multiple landscapes as a unified composition. The key is creating visual coherence while allowing each piece to breathe as an individual work.
Symmetrical vs Asymmetrical Arrangements
Symmetrical gallery walls are organized around a central axis. Paintings are arranged in a grid pattern or mirror-image layout. This approach feels formal and controlled.
Asymmetrical gallery walls have no central axis. Paintings vary in size and spacing, creating dynamic visual interest. This approach suits landscape collections where individual pieces vary in size, subject matter, and frame profile.
Start by laying out your paintings on the floor before hanging anything. Photograph different arrangements from above. Once you've settled on a layout, measure the position of each frame's center point and mark those locations on the wall lightly in pencil.
Mixing Frame Profiles and Composition
Frame profile refers to the style and width of the frame itself. Mixing profiles creates visual richness, but it requires intentional spacing.
When you mix frame styles, cluster frames of similar profiles together, then transition to a different style. This creates visual rhythm without feeling chaotic.
Landscape paintings naturally vary in composition. Mix orientations in your gallery wall. A horizontal landscape positioned next to a vertical one creates visual balance and prevents the wall from feeling monotonous.
Color palette matters more than frame matching. If your landscapes share a consistent color story, cool blues and greens, or warm ochres and browns, they'll feel cohesive even in different frames.
Visualizing Art Before Installation
Hanging holes are permanent. The ability to visualize your landscape in position before committing to placement prevents expensive mistakes.
Paper cutouts are the traditional method. Trace the outline of your frame onto kraft paper, cut it out, and tape it to the wall. Step back and view it from different distances and angles.
Digital visualization tools are faster. Many interior design apps let you upload a photo of your wall and position digital images of your paintings on it.
The most important step is viewing your visualization from across the room, not standing directly in front of it. Walk away, sit on your sofa, view it from the entryway. If you're uncertain about a gallery wall layout, visualize it for several days before hanging.
Hardware, Mounting, and Installation
The mechanics of hanging matter. Poor installation can damage your painting, create safety hazards, or result in the artwork shifting over time.
Use picture-hanging hardware rated for the weight of your frame. Picture hooks rated for 20-30 pounds are standard for most landscapes. If your frame is heavier, use heavier-duty hardware or wall anchors.
Drywall anchors are essential if you're hanging on drywall rather than studs. Toggle bolts or molly bolts distribute weight across a wider area and prevent the anchor from pulling through the wall. For heavier frames, locate studs and hang directly into them.
The hanging wire should be positioned so the frame sits level. Use a level to verify.
For gallery walls, use painter's tape to mark the position of each hook before drilling. This prevents mistakes and makes installation faster.
Original paintings from Cairngorm Artists arrive ready to hang, with frames and hardware included. This eliminates guesswork about frame quality and installation readiness. The safe-arrival promise means if anything arrives damaged, it's replaced.
Displaying original landscape paintings well is about respecting the work and protecting your investment. The right lighting reveals what makes each piece compelling. Proper placement at eye level creates natural engagement. Protection from sunlight preserves colors for decades. Gallery walls let you create compositions that feel intentional and curated.
Start with Cairngorm Artists' collection of original Highland landscapes. Each piece arrives ready to hang, framed and protected for display. Our artists create work that captures the raw beauty of Scottish scenery. With proper lighting, positioning, and protection, these original paintings become focal points that grow more meaningful over time.
Consider adding a piece like Mountain View - canvas print from original artwork (https://cairngormartists.com/products/mountain-view-canvas-print-from-original-artwork) for a calm autumn scene, or Lochside Whisper - canvas print from original artwork (https://cairngormartists.com/products/lochside-whisper-canvas-print-from-original-artwork) for a gentle, still moment. For a more abstract take on the Highlands, Storm over Glencoe - canvas print from original abstract art (https://cairngormartists.com/products/storm-over-glencoe-canvas-print-from-original-abstract-art) or Scottish Hillside - Canvas print from original artwork (https://cairngormartists.com/products/scottish-hillside-canvas-print-from-original-artwork) offer bold character. Each of these canvas prints is designed to bring the spirit of the Scottish Highlands directly to your home.


Frequently Asked Questions
Q: What is the best height to hang original landscape paintings?
A: The standard guideline places the center of the artwork at approximately 57 inches (145 cm) from the floor, which aligns with average eye level when standing. For seating areas, measure 8-10 inches above furniture. This height ensures the focal point of your landscape painting draws the eye naturally without requiring viewers to crane their necks. Adjust slightly if hanging multiple pieces or in rooms with different ceiling heights.
Q: How do I protect original paintings from sunlight damage?
A: Position paintings away from direct sunlight, which fades pigments and damages the canvas over time. Use UV-protective glass or acrylic in frames to filter harmful rays. If your room has large windows, hang pieces on walls that receive indirect light, or use sheer curtains to diffuse brightness. Monitor seasonal light patterns, as winter and summer angles differ significantly.
Q: What lighting setup works best for displaying original oil paintings?
A: Accent lighting with track lights or picture lights positioned above the frame highlights texture and brushwork in original paintings. Aim for warm, diffused light (2700K-3000K color temperature) to complement landscape art. Place lights at a 30-degree angle to minimize glare. Combine accent lighting with ambient room lighting for balanced viewing. Avoid harsh overhead lights that create reflections, and never use heat-generating halogen bulbs near original artwork.
Q: How do I arrange multiple landscape paintings on one wall?
A: Start by laying out pieces on the floor to test compositions. Asymmetrical arrangements work well for landscape paintings of varying sizes, creating visual interest while maintaining spatial balance. Maintain consistent spacing (typically 2-3 inches) between frames. Group pieces by visual weight—balance larger paintings with clusters of smaller ones. Consider color palette and composition flow to ensure the gallery wall reads as a cohesive, curated collection rather than random placement.

