

How to Display Original Art at Home: A 2026 Guide
Sep 12, 2026
Table of Contents
- Planning Your Display: Scale, Proportion, and the 70/30 Rule
- The Best Height to Hang Art (And Why 57 Inches Works)
- How to Arrange an Art Gallery Wall That Feels Curated
- Lighting for Original Paintings: See the Art, Not the Glare
- How to Protect Original Art from Sunlight and Damage
- Framing and Mounting: Budget Hacks and Pro Choices
- Conclusion
- Frequently Asked Questions
Last Updated: September 12, 2026
Planning Your Display: Scale, Proportion, and the 70/30 Rule
Most people hang art too small, too high, and too timidly. The single biggest mistake when you display original art at home is treating the wall as an afterthought rather than a composition. Get the planning stage right and everything else, the height, the hardware, the lighting, becomes straightforward.
The 70/30 rule is a useful starting point: artwork should fill roughly 70% of the available wall space above a piece of furniture, leaving about 30% as breathing room. A sofa that is 2 metres wide wants a piece (or grouping) around 1.4 metres wide. Too small and the art floats; too large and the wall feels crushed.
This guide from Cairngorm Artists covers how to plan, hang, light and protect original work so it looks intentional from day one.
Measuring Your Wall and Choosing a Focal Point
Measure the wall width, then subtract 30% to find your target artwork width. Note the height from floor to ceiling, and identify the room's natural focal point: a fireplace, a bed head, a dining table, a hallway end.
Your largest or most striking piece belongs there. Everything else supports it. A common mistake is spreading equal-sized works evenly across every wall, which flattens the room and gives the eye nowhere to rest.
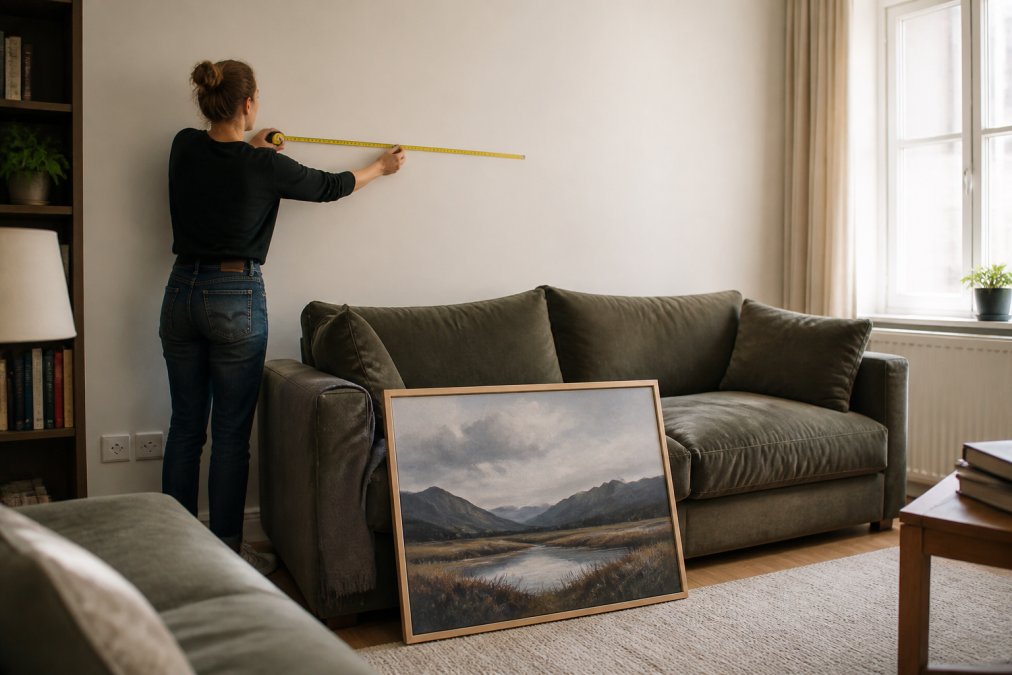
The Best Height to Hang Art (And Why 57 Inches Works)
The best height to hang art is 145 cm (57 inches) from the floor to the centre of the piece (nga.gov). This figure comes from gallery convention and matches the average human eyeline, so the work meets the viewer rather than looming above them.
For rooms where people sit for long periods, such as a dining room or lounge, drop the centre line slightly to around 135-140 cm. Above a sofa, keep the bottom edge 20-25 cm clear of the backrest. In a hallway where people stand, 150-155 cm works better.
Measure once, mark with pencil, and step back before drilling. What most guides miss is that a piece looks higher once it is actually on the wall than it did on the floor.
How to Arrange an Art Gallery Wall That Feels Curated
A gallery wall works when it has an internal logic. Before you touch a hammer, lay every piece on the floor and shuffle until the arrangement feels balanced. The goal is a curated collection, not a jumble. But "balance" is vague advice on its own, so here is the mechanical version most guides skip.
The Three Layout Templates That Cover Almost Every Wall
The grid. Best for same-sized or same-shaped pieces in a formal room. Use an odd number of columns (three or five) and an even number of rows (two or four). Keep the outer edges aligned to a single rectangle. This is the most forgiving layout because the eye reads the outer shape, not the individual frames.
The salon hang. Best for a large wall with mixed sizes. Anchor a single large piece slightly off-centre, then build outward with smaller works. The outer boundary should form a rough rectangle or oval. Keep the largest piece at roughly one-third of the total grouping width so it reads as the anchor without dominating.
The shelf or ledge run. Best for renters, small works, and anyone who wants to rearrange without new holes. A single picture ledge holds a row of works at varying heights, with the largest pieces at the back and smaller ones layered in front. This is the only layout where overlapping frames is acceptable.
Spacing Math That Actually Works
Consistent gaps are what make a grouping read as one composition. Most practitioners find 5-8 cm (2-3 inches) between frames works for standard-sized works, but the gap should scale with the frame size: smaller works look better with 4-5 cm, larger works with 8-10 cm. The critical rule is consistency, pick one gap and use it everywhere in the grouping.
For a grid, measure the total width of the frames plus the gaps, then centre that number on the wall. For a salon hang, work outward from the anchor piece and keep the gaps equal even when the frame sizes differ.
Planning Without Holes: Templates and Digital Mockups
Trace each frame onto kraft paper or newspaper, cut out the templates, and tape them to the wall. Live with them for at least 24 hours before committing. This is the single cheapest way to avoid hanging regret.
If you want to plan digitally first, several free and low-cost tools let you upload a photo of your wall and drag frames onto it. Most phone AR apps from frame retailers will also show a piece at scale on your actual wall through the camera. Neither replaces the paper template for checking real-world light and shadow, but they are useful for narrowing down a layout before you start cutting.
Symmetrical vs. Asymmetrical Layouts
Symmetrical arrangements suit formal spaces and matching frame sets. Asymmetrical layouts feel more relaxed and let you mix sizes freely. Neither is better; the choice depends on the room and the work.
For a symmetrical grid, use an even number of same-sized pieces. For asymmetrical, balance visual weight rather than physical size: a large dark piece on one side can be offset by two smaller light ones on the other. Visual balance matters more than mathematical symmetry.
Mixing Media, Frames, and Textures
Mixed media walls look best when one element ties them together. That might be a shared frame colour, a consistent mount width, or a recurring colour palette drawn from the work itself.
Vary texture deliberately: a watercolour beside an oil, a textile piece beside a photograph. Keep matting consistent at 5-8 cm to give smaller works presence. When mixing frame styles, limit yourself to two finishes. Three or more starts to look accidental.
Lighting for Original Paintings: See the Art, Not the Glare
Lighting for original paintings should reveal colour and texture without creating hotspots. The ideal is a warm-white LED (around 3000K) angled at roughly 30 degrees from the vertical, positioned above and slightly in front of the work.
Avoid direct ceiling downlights, which pool light at the top of the frame and leave the lower half in shadow. Picture lights work well for oils and acrylics but can wash out works on paper. For glare-prone glossy surfaces, diffuse the source or move it further to the side. Test with a torch before installing anything permanent.
How to Protect Original Art from Sunlight and Damage
To protect original art from sunlight, keep it off walls that receive direct sun. Ultraviolet light fades pigments, yellows paper, and breaks down canvas over time, and the damage is irreversible (peer-reviewed research).
Practical measures:
- Hang on north-facing or interior walls where possible
- Fit UV-filtering glazing if the work sits near a window
- Keep humidity stable, ideally 40-60%, and avoid bathrooms and kitchens (si.edu)
- Never hang above a radiator, fire, or heat source
- Dust with a soft, dry brush; never spray cleaner onto the surface
Conservation framing, using acid-free mounts and backing, prevents the slow chemical damage that ruins works from the inside.
Rental-Friendly Hanging Solutions
Renters can display original art without losing a deposit. Adhesive strips and hooks hold surprisingly well on painted plaster, provided you clean the surface first and respect the weight limit. Picture ledges rest on a single screw or sit freestanding on furniture, so the wall stays untouched.
For heavier pieces, a single small nail hole is easy to fill. Command-style hooks, tension rods across alcoves, and leaning works on a shelf or mantel all work well. Always check the weight rating before trusting an adhesive strip with an original piece.
Framing and Mounting: Budget Hacks and Pro Choices
Framing is where budgets stretch furthest, and it is also where most original art is quietly damaged. A well-chosen off-the-shelf frame with a custom acid-free mount looks far better than an expensive frame with poor matting. The mount, not the moulding, is what protects the work.
Why Archival Mounting Matters for Original Art
Original works on paper, watercolours, prints, drawings, photographs, are vulnerable to acid migration. Standard cardboard backing, cheap mat board, and even some adhesives release acids over time that yellow paper, burn the image, and leave irreversible stains. Conservation framing uses acid-free (often cotton rag or alpha-cellulose) mount board, acid-free hinging tape, and a backing board that blocks pollutants.
For oils and acrylics on canvas, the frame is mostly structural: it holds the stretcher, protects the edges, and provides a hanging point. Canvas does not need glazing, and putting it behind glass can trap moisture. Works on paper do need glazing, and the glazing should filter UV if the piece hangs anywhere near daylight.
Budget-Friendly Framing Options That Still Protect the Work
- Standard-size frame plus custom mount. Buy an off-the-shelf frame in the nearest standard size, then have a local framer or online service cut an acid-free mount to fit your actual artwork. This is usually the cheapest route to archival protection.
- Thrifted frame, new mount and glazing. A charity-shop frame can be repainted and fitted with new acid-free mount board and UV-filtering glazing. The frame is the cheap part; the mount and glass are what matter.
- Picture ledge, no frame. For canvases and deep-cradle works, a picture ledge skips framing entirely. This is also the best option for works that are too large or oddly shaped for standard frames.
- Clip frames for casual pieces. Glass clip frames are inexpensive and work for lightweight prints, but they offer no UV protection and no mount, so reserve them for low-value or replaceable works.
- Group smaller unframed works on a single mount board. A single large mount with several small works hinged to it reads as one framed piece and costs far less than framing each separately.
When to Pay for Professional Conservation Framing
For valuable, fragile, or irreplaceable pieces, professional conservation framing is worth the cost. A conservator will use museum-grade mount board, reversible hinging, and glazing that filters the majority of UV radiation. They will also advise on whether the piece should be glazed at all and how to back it to slow moisture exchange.
A useful rule of thumb: if the artwork is worth more than the framing quote, or if it cannot be replaced, pay for the conservation work. For everything else, a clean, simple frame with an acid-free mount lets the artwork speak without putting it at risk.
Conclusion
Getting original work onto your wall is only half the task; keeping it looking its best for years is the other half. Cairngorm Artists exists to make that easy: every piece from our collective of ten Highland artists arrives ready to hang, is shipped worldwide, and is backed by our safe-arrival promise. You get the wild beauty of the Scottish Highlands, framed and lit exactly as it deserves. Explore the collection at Cairngorm Artists and bring a piece of the Highlands home.
Frequently Asked Questions
What is the 70/30 rule in art?
The 70/30 rule suggests that art should occupy about 70% of the available wall space, leaving 30% as negative space. This prevents a wall from feeling overcrowded and gives each piece room to breathe. For example, if your sofa is 200cm wide, aim for art that spans roughly 140cm above it.
How high should original art be hung on a wall?
The best height to hang art is generally 145cm from the floor to the centre of the piece, which aligns with average eye level. In rooms where people mostly sit, such as dining rooms, lower it slightly to around 120cm. Always adjust based on your ceiling height and furniture placement.
How do you group multiple pieces of original art?
Start by laying pieces on the floor to experiment with arrangement. Keep consistent spacing of 5-8cm between frames. For a cohesive gallery wall, choose a focal point piece and build outward. Mix horizontal and vertical orientations, but maintain a common thread such as colour palette, frame style, or theme.
How can I protect original art from sunlight without blocking all light?
Use UV-filtering glass or acrylic when framing, and position art away from direct sun. Sheer curtains or blinds that diffuse light help. Rotate pieces every few months so no single work receives constant exposure. For works on paper, consider archival matting to prevent acid burn.

