

Restoring Damaged Scottish Canvas Paintings: A 2026 Guide
Oct 17, 2026
Table of Contents
- Assessing Damage: What You Can Handle and What Requires a Professional
- How to Fix a Torn Canvas Painting: Repair Techniques
- Cleaning a Damaged Canvas Painting Safely
- Professional Oil Painting Restoration: When and Why
- Cost to Restore an Old Painting: Budget and Timeline
- Common Mistakes to Avoid When Repairing Canvas Paintings
- Protecting Your Restored Painting: Storage and Display
- Frequently Asked Questions
Last Updated: October 16, 2026
Assessing Damage: What You Can Handle and What Requires a Professional
Restoring damaged scottish canvas paintings starts with honest assessment. You need to know what you can safely fix and when a professional conservator is essential. The difference between a successful DIY repair and permanent damage comes down to understanding your painting's condition first.
Most damage falls into two categories: surface issues and structural problems. Surface dirt, dust, and minor scratches are manageable. Torn canvas, punctures, water damage, and paint layer separation require skill and proper materials. A small tear in the corner is different from a large puncture through the middle of the composition.
Understanding damage severity
Canvas damage ranges from simple to complex. A small puncture (under 2 inches) with clean edges is repairable at home. A large tear, especially one affecting the painted surface or crossing important imagery, needs professional attention.
Look closely at the damage. Is the canvas itself torn, or is only the paint layer affected? Can you see through the hole, or is it just a crease? Does the paint feel loose around the damaged area?
Paint that is already lifting or flaking around a tear will continue deteriorating. Attempting a patch on unstable paint can trap moisture and accelerate damage.
When to stop and seek professional help
Stop immediately if you notice these warning signs:
- The painting is older than 50 years and has significant value
- Water damage has created stains, discoloration, or soft areas
- Paint is lifting or flaking extensively around the damage
- The tear affects a focal point or recognizable subject matter
- You are uncertain about the painting's age, materials, or condition
- The canvas has been lined (reinforced with backing) already
- Multiple areas show damage, this suggests underlying environmental problems
Professional conservators follow conservation ethics that prioritize reversibility. Their repairs can be undone if needed. A DIY repair using permanent adhesives or incompatible materials may lock in damage and prevent future conservation. If a painting has sentimental or monetary value, this risk is too high.
The cost to restore an old painting varies dramatically. A professional assessment costs far less than fixing a repair gone wrong. For Scottish paintings with heritage significance or for pieces you plan to pass down, professional treatment protects your investment.
How to Fix a Torn Canvas Painting: Repair Techniques
Repairing a torn canvas requires patience and the right materials. The goal is to stabilize the tear, reinforce the canvas, and restore the painted surface. This process involves several distinct steps, each critical to success.
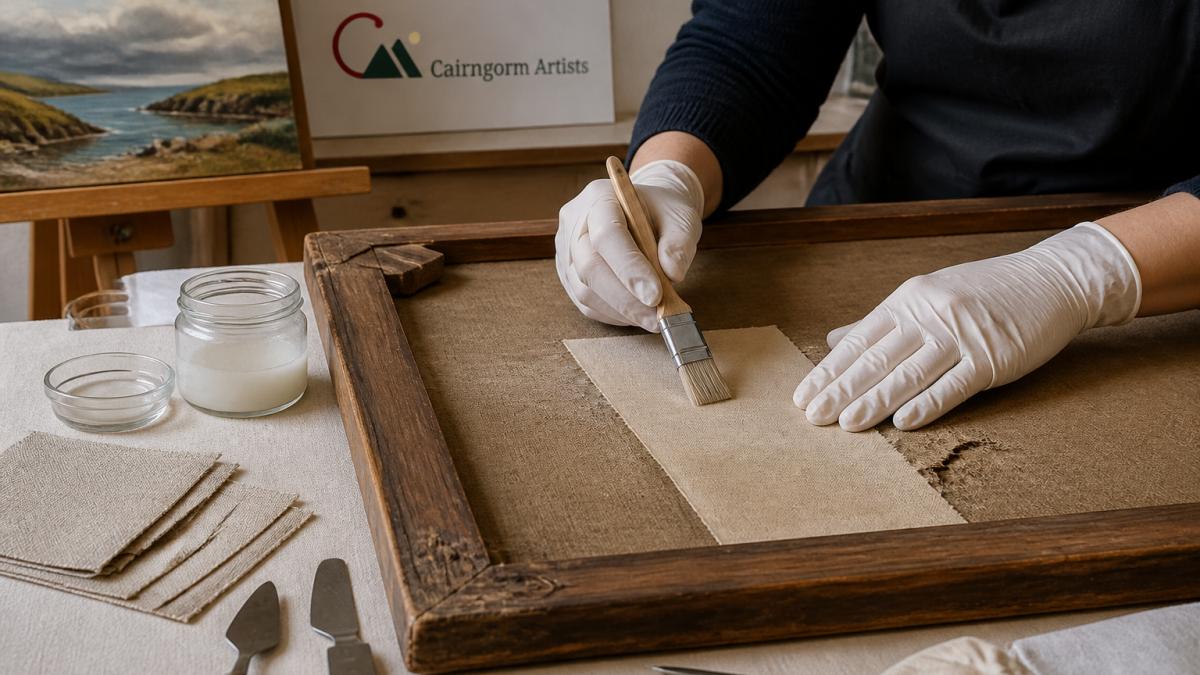
Preparing the damaged area
Start by stabilizing the tear itself. Do not attempt to glue the torn edges together directly, this creates a visible seam and weak repair. Instead, you will patch the canvas from the reverse side.
Clean the area gently with a soft brush or compressed air. Remove loose canvas fibers and debris.
Assess the paint around the tear. If paint is loose, do not attempt repair. Loose paint needs professional stabilization before patching. Attempting to patch over unstable paint will trap moisture and accelerate deterioration.
Choosing and applying patch material
The patch material must match the original canvas weight and weave. Canvas or muslin work well for most repairs. Muslin is slightly finer and blends more discreetly than heavy canvas.
Cut the patch 1-2 inches larger than the tear on all sides. Round the corners, sharp corners create stress points and can lift. The patch should sit comfortably against the reverse side of the canvas without forcing the tear closed.
Position the patch on the reverse side, centered over the tear. The patch should lie flat and not bridge any gap in the canvas.
Securing the patch with adhesive
Adhesive choice is critical. Use only archival-quality adhesive designed for canvas repair. Craft glue, hot glue, or permanent epoxy are unsuitable, they degrade, yellow, and become brittle over time. They also cannot be reversed if the repair fails.
Archival adhesive typically comes as a paste that you apply thinly to the patch. Apply adhesive to the patch, not directly to the painting. This gives you control and prevents over-saturation.
Press the patch firmly against the canvas. Use a bone folder or smooth tool to work out air bubbles. Apply steady, even pressure across the entire patch. Work from the center outward.
Drying and curing the repair
Allow the adhesive to cure fully. This typically takes 24-48 hours, depending on humidity and the adhesive used. Do not move the painting or apply pressure during curing.
After curing, inspect the repair from the front. The patched area should feel solid and stable. If you detect movement or soft spots, the adhesive did not cure properly, do not attempt to paint over it.
Once cured, you can address the painted surface. If the tear exposed bare canvas, a thin coat of paint matching the surrounding colours will make the repair nearly invisible. Use acrylics or oils that match the original medium.
Cleaning a Damaged Canvas Painting Safely
Cleaning damaged artwork requires extreme caution. Water and solvents can cause permanent damage if misused. The goal is to remove surface dirt without affecting the paint layer or canvas integrity.
Surface dirt versus paint damage
Understand what you are removing. Surface dirt sits on top of the paint layer. It is loose and can be lifted away. Paint damage is different, it is loss or deterioration of the actual painted surface. You cannot clean away paint damage; you can only stabilize it.
Test your cleaning method on an inconspicuous corner first. Use a white cotton swab and apply minimal pressure. If colour comes off on the swab, stop immediately. The paint is not stable enough for wet cleaning.
Safe cleaning methods and materials
Dry cleaning is safest. Use a soft brush, compressed air, or a dry microfiber cloth. Brush gently in one direction. This removes dust and loose debris without introducing moisture.
For stubborn surface dirt, use a barely damp cotton swab with distilled water only. Do not saturate the canvas. Dab gently, do not rub.
Never use household cleaners, alcohol, acetone, or harsh solvents on valuable paintings. These can dissolve varnish, lift paint, and damage canvas fibres.
If the painting has water stains or discoloration from previous water damage, professional cleaning is necessary. Conservators have access to specialized solvents and techniques that are safe for old paintings.
Professional Oil Painting Restoration: When and Why
Professional conservators bring expertise and materials that go far beyond DIY repair. Their work is guided by conservation ethics that prioritize the painting's long-term survival.
What professional conservators do
Conservators assess damage comprehensively. They identify the painting's age, materials, and condition. They determine what has caused the damage and what risks remain. This assessment guides all treatment decisions.
Professional restoration includes stabilization of loose paint, careful cleaning, structural reinforcement, and aesthetic restoration. Conservators work slowly and document every step. If a technique fails, they can reverse it and try another approach.
For Scottish paintings with heritage value, professional conservation protects cultural significance. Many paintings have regional importance or historical context that demands expert care.
Conservation ethics and reversibility
The core principle of conservation is reversibility. Every treatment should be undoable if needed. This means using only materials and techniques that do not permanently alter the artwork.
Permanent adhesives, synthetic materials, and aggressive cleaning methods violate this principle. A professional repair can be reversed; a DIY repair using permanent glue cannot. This is why conservators sometimes charge more, they are protecting the painting's future.
If you inherit a painting or acquire one with unknown history, professional assessment is worthwhile. The cost of assessment is small compared to the cost of fixing a botched repair.
Cost to Restore an Old Painting: Budget and Timeline
Restoration costs vary dramatically based on damage severity, painting size, and whether you choose DIY or professional treatment.
DIY repair costs versus professional treatment
DIY repairs for small tears or surface cleaning cost minimal money. Archival adhesive, patch canvas, and basic tools total under £50 for a single project.
Professional restoration is significantly more expensive. A conservator's assessment alone may cost £100-300. Full restoration of a damaged painting typically costs more, depending on the work required. Larger paintings and complex damage cost more than small, simple repairs.
The decision hinges on value. If the painting is worth more than the restoration cost, professional treatment is justified. If it is a modern piece with sentimental value only, careful DIY repair is reasonable.
Factors that affect restoration pricing
Painting size matters, larger canvases require more material and time. Damage extent is critical, a small tear costs far less than extensive water damage. The painting's age and condition affect complexity. Scottish paintings with historical significance may require specialized expertise, which costs more.
Timeline also varies. DIY repairs take days or weeks. Professional restoration can take months, especially if the painting requires environmental stabilization or extensive cleaning.
Many conservators offer payment plans or prioritize smaller jobs during slower periods. Ask about options if cost is a barrier.
Common Mistakes to Avoid When Repairing Canvas Paintings
Most canvas repair failures come from a few predictable mistakes. Knowing these prevents costly errors.
Using permanent adhesives is the biggest mistake. Craft glue, hot glue, epoxy, and super glue cannot be reversed.
Patching from the front instead of the reverse is another common error. This creates a visible seam and weak repair.
Attempting to repair unstable paint is dangerous.
Over-tightening patches causes new problems. Excessive pressure can warp the canvas or create stress points that cause new tears.
Ignoring environmental factors leads to repeat damage.
Cleaning with inappropriate materials is irreversible. Water, solvents, and harsh cleaners damage paint and canvas.
Protecting Your Restored Painting: Storage and Display
After repair, proper care prevents future damage. A restored painting needs protection from its environment.
Display the painting away from direct sunlight, which fades colours and weakens canvas fibres.
Use UV-protective glass or acrylic if framing the painting.
Handle the painting carefully. Always support it from the back, never by the frame edges.
Store paintings flat or at a slight angle, never upright against a wall.
Regular inspection catches new damage early.
Restoring damaged scottish canvas paintings preserves both the artwork and the connection to the landscapes and heritage they represent.
At Cairngorm Artists, we understand the value of original artwork and the care it deserves.
Frequently Asked Questions
What should you do first if a canvas painting is torn?
Stop handling the painting immediately to prevent the tear from spreading. Assess the damage severity: small punctures or tears under 5 cm may be repairable at home, but large tears, multiple damage areas, or damage to the paint layer itself require professional conservation. Place the painting flat in a safe location, avoid touching the damaged area, and document the damage with photos before attempting any repair.
Can you repair a tear in an oil painting canvas at home?
Small, clean tears in the canvas (not the paint layer) can be repaired at home using appropriate patch material like canvas or muslin and reversible adhesive. However, oil paintings with heat-sensitive paint or historical value should go to a professional. If the tear is near the painting's edges, affects the paint layer, or the canvas is fragile, professional restoration is safer and preserves the artwork's integrity and value.
How much does it cost to have an old painting restored?
Professional restoration costs depend on damage severity, canvas size, paint condition, and the conservator's expertise. A simple canvas repair may cost less than a full cleaning and paint touch-up. Get a quote from a qualified conservator who can assess your specific painting. DIY repairs for minor damage cost only the price of patch material and adhesive, but mistakes can be expensive to fix.
When should a damaged canvas painting be taken to a professional conservator?
Seek professional help if the painting is valuable, historically significant, or has water damage, mold, or extensive paint loss. If the tear is large, jagged, or affects multiple areas, or if the canvas itself is fragile or old, conservation is essential. Professional conservators use reversible techniques that preserve the artwork's integrity and can address damage beyond tears, such as yellowing varnish or structural weakness in the canvas support.


